Beastly Truck Sublimation Clipart Bundle: What to Watch For Before You Buy and Use It
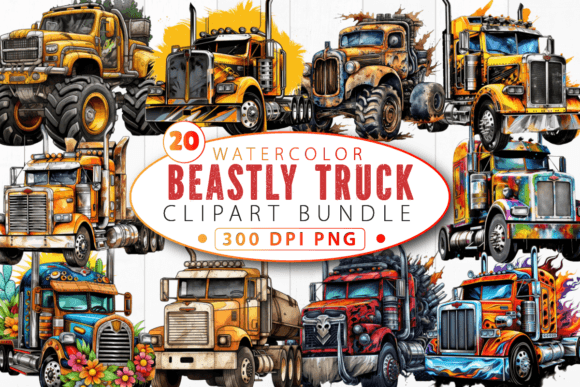
If you design sublimation products—t-shirts, mugs, tote bags, hats, or phone cases—you already know that finding the right artwork makes or breaks your finished piece. The Beastly Truck Sublimation Clipart Bundle promises a collection of rugged, high-energy truck illustrations that can give your projects that off-road, adrenaline-fueled aesthetic. Monster trucks, mud-covered pickups, flames, tire tracks, and grunge textures all in one package sounds like a dream for anyone serving fans of extreme sports, outdoor adventure, or simply the raw look of a beastly vehicle.
But here is the truth: not every bundle delivers what you expect, and the way you select, prepare, and apply this type of clipart matters a lot more than most beginners realize. Let me walk through the most common pitfalls I have seen—and how to avoid them so that your final product looks professional, sells well, and holds up to wear.
The Mistake of Assuming All Clipart Is Ready for Sublimation
One of the most frequent misunderstandings I encounter is people assuming that any PNG file with a transparent background is immediately ready for sublimation. That is not always the case. The Beastly Truck Sublimation Clipart Bundle is marketed as high-resolution PNGs, which is a good start. But resolution alone does not guarantee that the file will print cleanly on a dark shirt, a ceramic mug, or a polyester blend tote.
You need to check a few specifics before you even open your design software. First, confirm the actual pixel dimensions. A file labeled "high resolution" should be at least 300 DPI at the size you intend to print. If you try to scale a 1500-pixel-wide image up to fit across the back of a shirt, you will end up with blurry edges and disappointed customers.
Second, look at the transparency. Some clipart bundles include faint halos or rough edges around the artwork, especially around complex elements like flames or mud splashes. That can leave a ghostly outline on your sublimated product. Before using any element from the bundle, zoom in close and verify that the edges are truly clean. If they are not, you can often fix them with a quick pass using the eraser tool or by adjusting the layer mask, but it is better to know upfront than to discover it after printing.
Overlooking the Color Shift Between Screen and Print
Another common error is trusting what you see on your monitor. The Beastly Truck Sublimation Clipart Bundle features vivid colors—bright reds, deep blacks, metallic grays, and neon accents. Those colors look fantastic on screen. But sublimation printing is a heat-transfer process, and colors often shift during that process. Cyan can go greener, reds can turn orange, and whites can yellow if the paper or coating is not handled correctly.
I have watched hobbyists print a gorgeous beastly truck design only to pull the paper off and find that the flames look more like dull orange smudges. The fix is not difficult, but it requires a habit: always run a small test print on a scrap piece of sublimation paper and press it onto a test substrate that is similar to your final product. Adjust your file's saturation, contrast, or color balance based on what actually comes out, not what your screen shows.
Also, keep in mind that sublimation works best on white or light-colored substrates. If you are printing on a dark shirt, you will need a white base layer underneath, and the colors from the bundle will appear differently over that base. Plan your designs accordingly.
Ignoring File Format and Layering Limitations
The bundle comes in PNG format, which is excellent for quick drag-and-drop use. But PNG is a flat format. You cannot separate the flames from the truck, adjust the mud splashes independently, or recolor a single element without cutting it out manually. This limitation matters if you want to customize the design for different products or different customer preferences.
Say you want to use the same truck on a mug but with blue flames instead of red. With a flat PNG, you either have to live with the original colors or spend time selecting and recoloring pixel by pixel. A better approach is to ask the seller whether they also offer layered PSD, SVG, or AI versions of the bundle. If they do, invest in those. If they do not, plan your designs around the fixed color scheme, or use tools like the "Color Replacement" brush in your editing software to make adjustments without destroying quality.
Another overlooked detail: some bundles include multiple files but do not clearly name them. You might find yourself searching through 50 files labeled "truck01.png," "truck02.png," and so on, with no indication of which one has the monster tires or which has the grunge overlay. Before you start a big project, take 15 minutes to rename and organize the files into folders—trucks, textures, elements, backgrounds. That small step will save you hours of frustration later.
Using Every Element at Once Instead of Editing with Purpose
I see this mistake especially often among beginners: they open a design and try to include every truck, every flame, every mud splash, and every tire track from the bundle in a single composition. The result is a cluttered, confusing image that loses all impact. A beastly truck design should feel powerful, not crowded.
Think about what your product needs. A t-shirt for a monster truck rally might benefit from one main truck, a bold flame accent behind it, and maybe a subtle grunge texture to give it grit. A mug for a construction company might just need a clean pickup with a tire track border. A phone case for an off-road enthusiast could use the truck plus mud splashes, but keep the background simple.
Editing with purpose means asking yourself: what is the one thing I want people to see first? That is your hero element. Everything else should support it, not compete with it. The bundle gives you plenty of options, but restraint is what separates a professional-looking product from a DIY mess.
Neglecting the Difference Between Commercial and Personal Use
This point is easy to overlook, and it can cost you money or legal trouble later. Many clipart bundles come with specific licensing terms. Some allow unlimited commercial use, meaning you can sell products made with the artwork. Others restrict you to personal projects or limit the number of sales you can make. The Beastly Truck Sublimation Clipart Bundle likely has its own licensing details, and you need to read them carefully before listing anything on Etsy, Amazon, or at a craft fair.
If you plan to run a small business selling sublimated products, confirm that the bundle allows commercial use without attribution. If the license requires you to credit the artist, you need to figure out how to do that on a product label or listing description. If the license limits the number of units you can sell, track your sales so you do not exceed that cap. I have seen sellers get their shops suspended because they used clipart without proper rights. Do not let that be you.
Skipping the Mockup Step Before Production
Many creators get excited and go straight from file to printer. That is a mistake. Before sublimating anything for a client or for inventory, create a mockup that shows how the design will look on the actual product. The Beastly Truck Sublimation Clipart Bundle elements need to be placed correctly—centered on a shirt, wrapped properly around a mug, scaled appropriately for a tote bag. A mockup helps you catch placement errors, size issues, and color clashes before you waste a blank substrate.
You can use free mockup templates available online or create your own by photographing a blank product and overlaying your design in your editing software. This extra five minutes of effort prevents returns, unhappy customers, and wasted materials.
Forgetting That Sublimation Requires Specific Substrates
Finally, a reminder that sublimation only works on polyester or polymer-coated surfaces. The beastly truck designs from this bundle will not adhere to 100% cotton shirts, uncoated ceramics, or untreated metals. If you press a design onto the wrong material, the image will wash out, peel off, or look faded from day one.
Always check your blanks. Look for high polyester content in apparel, and use sublimation-coated mugs, coasters, and phone cases. The bundle itself is excellent, but it cannot compensate for the wrong substrate. Educate yourself on the materials you use, and test every new blank type before you commit to a production run.
Final Thoughts on Getting the Most from This Bundle
The Beastly Truck Sublimation Clipart Bundle offers real potential for creating bold, memorable products that appeal to truck enthusiasts, off-road fans, and anyone drawn to a rugged visual style. But the artwork alone is not enough. Your preparation, your understanding of the sublimation process, your editing choices, and your attention to licensing and materials all determine whether the final product meets your expectations.
Take the time to inspect the files, run test prints, organize your assets, edit with a clear purpose, and respect the licensing terms. When you do, you will create products that look sharp, sell well, and stand up to real use. That is the difference between just owning a clipart bundle and truly putting it to work.