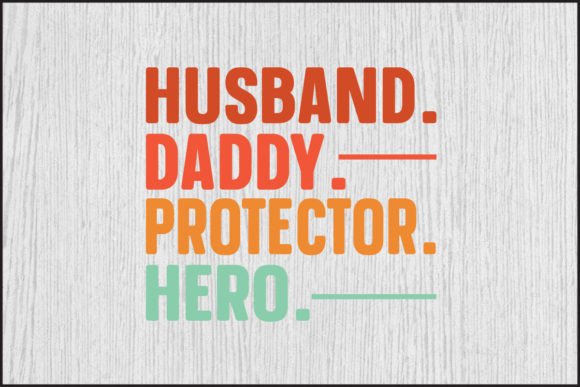
Husband.Daddy.Protector.Hero, Dad Papa.: A Design Bundle for Celebrating the Men Who Shape Our Lives
When you need a visual that says everything about a man’s role in the family, few phrases carry as much weight as “Husband.Daddy.Protector.Hero” or its close companion “Dad Papa.” These words are more than a label—they encapsulate the quiet strength, everyday dedication, and unconditional love that fathers and husbands bring to their households. The Husband.Daddy.Protector.Hero, Dad Papa. design bundle delivers that meaning in a ready-to-use digital format, saving you hours of concept development and manual artwork creation.
This bundle arrives as a ZIP folder containing four file types: one SVG file, one DXF file, one PNG file (vector, 300 DPI high resolution with transparent background), and one EPS file. Whether you run a small print-on-demand shop, design custom gifts for clients, or craft keepsakes for your own family, these assets give you a polished, scalable starting point. In this article we’ll walk through what each file offers, how to integrate the bundle into your existing workflow, and practical ways to use the designs before, during, and after a project.
What’s Inside the Bundle and Why Each Format Matters
The ZIP folder is compact but packed with versatility. Let’s break down each component and where it fits in a typical production pipeline:
- SVG (Scalable Vector Graphics) – Ideal for cutting machines like Cricut and Silhouette, as well as web use and further vector editing. Because SVG files preserve crisp edges at any size, you can scale the design to fit a mug, a banner, or a full-size poster without quality loss.
- DXF (Drawing Exchange Format) – Commonly used for CAD and laser cutting. If you work with a laser engraver or a CNC router, the DXF version of “Husband.Daddy.Protector.Hero, Dad Papa.” is ready to import into LightBurn or similar software. It keeps the vector paths clean, reducing setup time for physical engraving projects.
- PNG with Transparent Background – At 300 DPI and high resolution, this raster file works immediately for digital mock-ups, social media graphics, or printing on surfaces where you need a transparent backdrop. The resolution supports commercial print quality for items like T-shirts and greeting cards.
- EPS (Encapsulated PostScript) – A robust vector format compatible with professional design suites such as Adobe Illustrator, CorelDRAW, and Affinity Designer. EPS preserves layers and color information, making it the best choice if you need to adjust colors, add effects, or combine the text with other design elements.
Having all four formats in one download eliminates the need to convert files yourself, which often introduces errors or loss of detail. This is especially valuable when you work across multiple machines or collaborate with vendors who require specific file types.
Integrating the Designs into Your Workflow
A successful project doesn’t start with cutting or printing—it starts with understanding how each file behaves in your ecosystem. The Husband.Daddy.Protector.Hero, Dad Papa. assets are designed to drop into common workflows with minimal friction. Here are the key integration points to consider:
Preparation and Software Compatibility
Before you open a design, check the software you plan to use. SVG and EPS are vector-based, so they work best in vector editing programs. PNG is raster, so it opens in any image editor or even in basic preview tools. The DXF may require a CAD or laser-cutting application. Install the appropriate software updates and verify your machine’s driver compatibility if you are cutting or engraving. A quick test of each file—opening it, checking that layers appear correctly, and confirming the dimensions—can save you from surprises later.
Sizing and Scaling
Always start with the original vector files (SVG or EPS) when you need to resize. Because the designs are vector-based, you can shrink them for a notebook cover or enlarge them for a wall decal without pixelation. For the PNG, preserve the 300 DPI setting if you are printing; if you plan to use the PNG for digital display, you can safely reduce the resolution to 72 DPI to save file size. Avoid upscaling the PNG beyond its original dimensions because it will blur. Use the vector files for any significant size change.
Color Adjustment and Personalization
The default design likely uses a single color or a limited palette (common for SVG cut files). In your vector editor, you can change the fill color to match your project’s theme—for example, a gold foil look for a certification, or a distressed black for a rugged T-shirt print. EPS files usually preserve the ability to separate colors by object, so you can easily change the text fill, stroke, or add gradients. If you want to add a secondary line such as “Always My Hero” beneath the main phrase, simply duplicate the vector and align it using the software’s snapping tools.
Before, During, and After a Project: Practical Application
How you use the bundle can be broken into three phases. Each phase has its own considerations and best practices.
Before the Project: Planning and Asset Management
When you first download the ZIP, extract all files into a dedicated folder. Give the folder a clear name like “Dad Papa Design Bundle” and add tags such as “father’s day,” “husband gift,” “masculine theme.” This organizational step pays off when you have dozens of bundles and need to find this specific set quickly. Next, import the vector file (SVG or EPS) into your design library. If you use Cricut Design Space, you can upload the SVG directly. For Silhouette Studio, DXF or SVG both work. In Adobe Illustrator, open the EPS and save as a template file (.ait) to preserve your settings for future use.
Consider your end product. For a T-shirt heat transfer, you might need a mirrored version of the design if you are using vinyl. The vector files allow you to simply flip the artwork horizontally. For a mug or tumbler, you will want to adjust the artwork size to fit the wrap area—usually about 8.5 inches wide for a standard 11 oz mug. Make a note of the safe zone so no text is cut off by the cup’s handle or rim.
During the Project: Execution and Consistency
Whether you are cutting vinyl, printing on paper, or engraving wood, consistency in setup ensures that every product matches your quality standards. Use the same cut settings (pressure, blade type, material thickness) that you have tested for the specific substrate. If you are producing multiple units—for example, a batch of 50 “Husband.Daddy.Protector.Hero” T-shirts for a family reunion—create a production template in your design software that includes registration marks or alignment guides. The vector files make this easy because you can duplicate the design and arrange them in a grid, maximizing material usage.
If you work with a print-on-demand service, upload the PNG (for raster-based printers) or the EPS (for vector-friendly printers) directly to their platform. Double-check the file naming convention required by the service—some prefer “design_name.png” with no spaces. The high-resolution PNG is often the safest choice for POD because it embeds the correct DPI and transparency.
After the Project: Archiving and Reuse
Once your project is finished, don’t delete the original ZIP or the edited files. Instead, archive the final artwork along with a note about the materials and settings used. This allows you to reproduce the exact design later without re-doing the setup. If you made customizations—such as changing the color to teal for a specific client—save that version with a descriptive filename. The bundle’s vector formats give you the flexibility to revisit and tweak even years later.
Resell the physical products you create, but remember to check the license that came with the bundle. Many design sets allow unlimited commercial use for finished products, but may restrict redistribution of the digital files themselves. Keep the license file from the ZIP for your records.
Real-World Use Cases from Apparel to Home Decor
The phrase “Husband.Daddy.Protector.Hero” works well for a wide range of products. Here are a few examples of how creators have integrated the bundle into their workflows:
- T-shirts and Hoodies – Heat press vinyl from the SVG onto fabric. Use a bold, contrasting color like white on a charcoal shirt. For a vintage look, size the design to occupy the chest area and distress the edges in your software before cutting.
- Mugs and Tumblers – Sublimate the design onto a poly-coated mug using the EPS file adjusted to a cylindrical wrap. The transparent PNG also works well for dishwasher-safe epoxy coasters.
- Wood Signs and Plaques – Import the DXF into a laser engraver and cut the outline. Add a “Happy Father’s Day” line above if desired. The clean vector paths produce sharp edges on wood and acrylic.
- Greeting Cards and Invitations – Use the PNG as a centerpiece for a folded card. pair it with a subtle pattern background printed from the EPS. The high resolution ensures crisp text even on premium cardstock.
- Banners and Posters – Scale the SVG up to 24x36 inches for a banner. Because the design stays sharp, it works for large format prints in church halls or family events.
Each use case benefits from the same core practice: start with the vector file, test on scrap material, and then run production runs.
Tips for Ensuring Quality and Consistency Across Projects
Quality control often separates a one-time hobby project from a reliable product line. Apply these checks every time you use the Husband.Daddy.Protector.Hero, Dad Papa. bundle:
- Verify resolution – The PNG is 300 DPI, but if you resize it in a raster editor, the DPI may change. Stick to the vector files for any scaling.
- Check file integrity – After extracting the ZIP, open each file once to confirm it isn’t corrupted. Re-download if any file fails.
- Test cut or print on a small scale – Run a single unit before committing to a bulk order. This catches kerning issues or color shifts that only appear on certain materials.
- Maintain a swatch library – If you change the design’s color for different substrates, document the exact hex code or CMYK values. This ensures repeat orders look identical.
- Back up your work – Store the original ZIP and your edited versions in at least two locations (local drive + cloud storage). Digital assets are easy to lose but hard to recreate.
The bundle’s simplicity is its strength. You don’t need to spend time re-drawing text or cleaning up uneven lines. The professional vector artwork handles the heavy lifting, allowing you to focus on production speed and creative presentation.
From a single T-shirt for a family gathering to a catalog of products for your shop, the Husband.Daddy.Protector.Hero, Dad Papa. design bundle offers reliable, re-usable assets that fit into nearly any creative workflow. By preparing your software, understanding each file’s best use, and applying consistent quality checks, you can turn these few simple words into meaningful, high-quality products again and again.