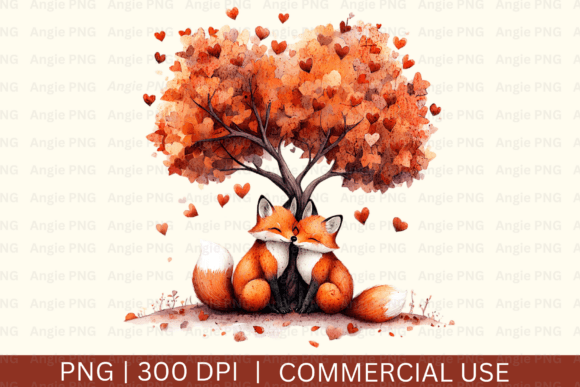
Retro Valentines Day Sublimation Bundle
Whether you run a small print-on-demand shop, design digital products for Etsy, or craft handmade gifts for friends, finding the right set of graphics can make or break your project timeline. The Retro Valentines Day Sublimation Bundle delivers eight high-resolution PNG files built specifically for sublimation workflows. Each file comes at 300 dpi with a transparent background, sized at 6000×6000 pixels — offering enough detail for large prints and enough flexibility for complex layouts.
This bundle gives you a cohesive, nostalgic Valentine’s aesthetic that works across physical products, digital mockups, and marketing materials. But knowing what the files contain is only the first step. The real value comes from understanding how to fit these assets into your actual production process — from preparation through final sale.
Understanding the Bundle’s Place in Your Creative Workflow
Sublimation printing involves transferring designs from paper to substrate using heat and pressure. The process is linear: you start with a digital design, print it onto sublimation paper, then press it onto a blank product. The Retro Valentines Day Sublimation Bundle sits squarely in the design sourcing stage, but its influence extends both backward and forward.
- Before production: You need to choose a theme, source quality graphics, and test compatibility with your printer and software. This bundle eliminates the need to design from scratch or cobble together mismatched clipart.
- During production: The PNG files can be opened, resized, and color-checked within minutes. Their transparent backgrounds simplify layering onto templates or mockups.
- After production: You can reuse the same assets for social media posts, order confirmations, or bundle them into future collections — saving you time on every subsequent project.
Because the files are not SVG, you must handle them as raster images. That means resolution and scale are fixed, but at 6000×6000 pixels you have generous headroom for most commercial products. The bundle works especially well for print-on-demand sellers who need consistent retro Valentine’s designs across different product categories without reworking the art every time.
Before: Preparing Your Setup and Assets
Start by unzipping the archived files and organizing them into a dedicated folder. Name the folder something like “Retro Valentines Bundle – 2025” so you can find it later. Open each PNG in your design software — Photoshop, Affinity Designer, Canva Pro, or GIMP — and verify that the colors match your printer’s ICC profile. Because sublimation inks sometimes shift on polyester fabrics, you may want to adjust saturation or brightness beforehand.
Many creators use this stage to create master templates. For example, if you plan to sell tumblers, mugs, and T‑shirts with these designs, build a template file with pre‑centered guides for each product. Then import a copy of the retro graphic and position it exactly where it needs to be printed. This preparation reduces errors during the actual production run.
During: Efficient Production and Layering
With your templates ready, production becomes a matter of drag, drop, and print. Because the PNGs have transparent backgrounds, you can place them over colored backgrounds, textures, or other elements without manual masking. For layered sublimation projects — such as adding a retro heart graphic behind a custom name — the transparent background is a major time-saver.
A common workflow: open the template file, place the retro design as a new layer, adjust opacity or blending mode if needed, then flatten the image and print onto sublimation paper. You can repeat this process for each design in the bundle, swapping files quickly without re-creating alignment marks. For batch production, use your software’s data merge or variable data tools to combine the graphic with different text elements — but because these are PNGs, linking them as external assets keeps file sizes manageable.
After: Repurposing and Quality Control
After pressing the designs onto products, you can use the same PNG files for listing photos, social media posts, and marketing banners. Export a 72 dpi version for web use, or keep the originals for future print runs. Because the bundle offers a consistent retro style, customers will recognize your brand’s aesthetic across different items — and you can maintain that consistency without recreating graphics each time.
Quality control gains from using these files: the 300 dpi resolution means you can inspect details at 100% zoom and catch any artifacts before printing. Compare the pressed result to the digital file to ensure the color profile translated correctly. If you notice a shift, adjust your printer settings or ICC profile and save that adjusted PNG as a custom variant for future use.
Compatibility and Technical Considerations
The bundle is explicitly not an SVG and cannot be used as one. That means you cannot scale the graphics infinitely without resolution loss. However, 6000×6000 pixels at 300 dpi yields a physical print size of 20×20 inches (about 50×50 cm). That covers most standard sublimation blanks: tumblers (up to 20 oz), mugs (11–15 oz), T‑shirts, tote bags, pillow covers, and even large mouse pads. If you need a smaller print, simply resize down — the quality holds.
Make sure your design software accepts PNG files with transparency. Most do, but if you work with a program that treats all images as flat layers, verify that the alpha channel is supported. The bundle is also compatible with subscription-based design platforms like Canva Pro, but you may need to upload the files as elements and check that the transparent background remains intact.
For sublimation printers such as Sawgrass, Epson EcoTank, or Ricoh, the PNG workflow is standard. Print at the highest quality setting, mirror the image (almost always required for sublimation), and use paper that matches your printer’s specifications. Because these graphics are already rasterized, you won’t need to convert from vector, saving a step.
Integrating with Other Tools and Platforms
- Design software: Works directly in Photoshop, Illustrator, Affinity, CorelDRAW, Inkscape, and Canva. Use them as layered elements or merge them with text.
- Print-on-demand marketplaces: Upload to Printful, Printify, CustomCat, or Gelato. Follow their t-shirt or mug guidelines for design size and resolution — the 6000×6000 PNG often exceeds their requirements, so resize accordingly.
- E‑commerce platforms: Use the same files for product mockups on Etsy, Shopify, or Amazon Handmade. Many mockup generators accept PNG overlays with transparency.
- Digital products: Sell the bundle itself as a digital download (if the license permits). Since it’s already prepared with high specs, it’s ready for resale with minimal editing.
When combining with other assets — like bold typography, patterned backgrounds, or vintage textures — the transparent background reduces clipping issues. You can also invert colors, apply filters, or crop elements. Just retain a backup copy of the original PNG before making irreversible changes.
Small Business Owner Selling Valentine’s T‑Shirts
You have an online store and want to launch a limited Valentine’s collection. With this bundle, you pick four designs, load them into your template, and print test transfers. Because the graphics are retro and consistent, the entire collection feels curated. You schedule a two-week production run, using the same files for mockup photos and Instagram posts. After the season, you archive the folder and reuse the designs next February.
Pod Merchant Creating Matching Mug Sets
You sell mugs in sets of four, each with a different retro Valentine graphic. Using the bundle, you create a standard mug template in Photoshop (centered, mirrored, size 10.5×10.5 inches at 300 dpi). You drag in each PNG, adjust brightness for the mug’s coating, and batch print. For product listing images, you composite the digital PNG over a mug mockup. The entire process from template setup to listing takes under an hour per design variation.
Teacher or Hobbyist Making Classroom Gifts
You want to print Valentine’s Day stickers, bookmarks, and mini tote bags for your class. The large 6000×6000 resolution lets you scale down the design to 2×2 inches without losing crispness. You arrange multiple designs on one sheet of sublimation paper, print, and press. The transparent background makes it easy to combine graphics with student names in Canva. The bundle’s retro style adds a unique look that stands out from store-bought cards.
Tips for Long-Term Use and Project Consistency
- Organize by project: Create a master asset folder with subfolders for each bundle purchase. Include a note file with resolution, dpi, and any color adjustments you made.
- Document color profiles: After you calibrate your printer to a specific design, save that PNG as a preset. Label it with the product type (e.g., “RetroHeart_RGB_Sawgrass_Tumbler”).
- Use in brand bundles: If you sell on Etsy, combine this bundle with other retro or Valentine’s assets to create a themed collection. Customers appreciate seeing design consistency across multiple items.
- Backup the originals: Store the archive in cloud storage and a local drive. The files are your starting point — once you edit a PNG, you cannot reconstruct the original details from the altered version.
Making the Bundle Work in Your Routine
Adopting a file bundle like this is not about adding extra steps to your workflow — it’s about eliminating unnecessary ones. When you already have high-quality, cohesive graphics ready to go, you can skip the sourcing, licensing, and proofing stages that often consume hours. The Retro Valentines Day Sublimation Bundle fits directly into the design-sourcing slot of your production pipeline, and from there it can be reused, adapted, and extended across seasons and product lines.
Check your software compatibility before purchase, especially regarding SVG reliance. Organize the files before you start a print run. Test one transfer with a single design to confirm color and size. Then scale up to full production with confidence. With this bundle, the retro Valentine’s look is already done — you just need to execute.